Getting started with Sanity
9 minutes
Creating a new project
If you haven't created a Sanity account yet, you can do so here: https://accounts.sanity.io/signup
From there, you can then create a new project, or you can do so through the CLI. Both will guide you through the process, but we'll focus on the CLI approach here.
Create a new project by running:
npm create sanity@latest
You'll be guided through all the options. Along the way you'll get to select a template, we'll use a clean setup today. You'll find a summary of the final terminal output below with some of the options I selected:
? Create a new project or select an existing one Create new project
? Your project name: <your project name here>
? Select organization: <your organization>
? Project output path: > C:\path\to\project
? Select project template > Clean project with no predefined schema types
? Do you want to use TypeScript? > Yes
✓ Bootstrapping files from template
✓ Resolving latest module versions
✓ Creating default project files
? Package manager to use for installing dependencies? > npm
Once that's done, this is what the project structure looks like:

Schema types
Let's create some schemas. We're going to need one for the home page so we can edit its content, articles, and some objects for promoting the articles on the home page.
Starting with the home page, we'll create a new document type under /schemas/documents.
import { defineType } from "sanity";

export const homePage = defineType({
  name: "homePage",
  title: "Home page",
  type: "document",
  fields: [
    defineField({
      name: "heroTitle",
      title: "Hero title",
      type: "string"
    }),
    defineField({
      name: "heroImage",
      title: "Hero image",
      type: "image"
    })
  ]
});
This schema defines a simple home page document with two fields: a title and an image which will be used as a background for the hero section.
A real world setup would do best with some descriptions and validations, but we'll skip that for this example
In a similar fashion, let's create an article schema:
import { defineField, defineType } from "sanity";

export const article = defineType({
  name: "article",
  title: "Article",
  type: "document",
  fields: [
    defineField({
      name: "title",
      title: "Title",
      type: "string"
    }),
    defineField({
      name: "slug",
      title: "Slug",
      type: "slug",
      options: {
        source: "title"
      }
    }),
    defineField({
      name: "content",
      title: "Content",
      type: "array",
      of: [{ type: "block" }]
    })
  ]
});
The slug field is automatically generated from the title field, creating a URL segment that is both valid in a URL and describes the content at the same time.
The content field is a special one. It can contain a variety of object types, but by specifying block we get a rich text editor. You can read more about what it can do in Sanity's documentation.
In order to promote these on the home page, let's create a new object type. I imagine this as a full width section consisting of a title and a link, accompanied by an image that could be placed on the left or right side of the title and link - I'll leave that logic to the public facing web application though.
Given the desired behaviour, let's call it "Zig-zag":
import { defineField, defineType } from "sanity";

export const zigZag = defineType({
  name: "zigZag",
  title: "Zig-zag",
  type: "object",
  fields: [
    defineField({
      name: "title",
      title: "Title",
      type: "string"
    }),
    defineField({
      name: "link",
      title: "Link",
      type: "reference",
      to: [{ type: "article" }]
    }),
    defineField({
      name: "image",
      title: "Image",
      type: "image"
    })
  ]
});
Reference fields like link here allows you to create relationships between different documents, in this case we'll use it to create a link from the zig-zag object to a specified article.
To be able to add zig-zag objects to the home page, we need to update the home page with a new field. Similar to the content field on articles, we'll add an array field, but this time restricting the type to "zigZag":
export const homePage = defineType({
  ...
  fields: [
    ...
    defineField({
      name: "content",
      title: "Content",
      type: "array",
      of: [{ type: "zigZag" }]
    })
  ]
});
Almost done
Before we can go ahead and create some content, we need to register the schemas, which is done by simply importing them into schemas/index.ts and adding them to the already defined schemas array:
import { article } from "./documents/article";
import { homePage } from "./documents/homePage";
import { zigZag } from "./objects/zigZag";

export const schemaTypes = [article, homePage, zigZag];
Updating the structure view
An awesome feature of Sanity is that you can quite easily modify the structure view to achieve a more logical presentation of content in the studio and make editing easier. It isn't a requirement in general though, as all registered document types are automatically presented in the structure view by default so you can create content of each type.
In our case though, since we want to restrict us from creating more than one home page, we'll have to modify it.
Create a new file for the structure customization at /structure/index.ts:
import { StructureResolver } from "sanity/structure";
import { DocumentIcon, HomeIcon } from "@sanity/icons";

export const structure: StructureResolver = S =>
  S.list()
    .title("Content")
    .items([
      S.documentListItem()
        .schemaType("homePage")
        .title("Home")
        .id("home")
        .icon(HomeIcon),
      S.documentTypeListItem("article")
        .title("Articles")
        .icon(DocumentIcon)
    ]);
Update sanity.config.ts by passing our exported structure to structureTool():
import { defineConfig } from "sanity";
import { structureTool } from "sanity/structure";
import { structure } from "./structure";

export default defineConfig({
  ...
  plugins: [
    structureTool({ structure }),
    ...
  ],
  ...
});
This creates a root panel called "Content", listing a singular document of type homePage, and then a subpanel of all documents of type article.
Creating content
Let's see our new stuff in action! Start the site by running:
npm run dev
and open the URL printed in the terminal (default: http://localhost:3333). The studio should now look like this:
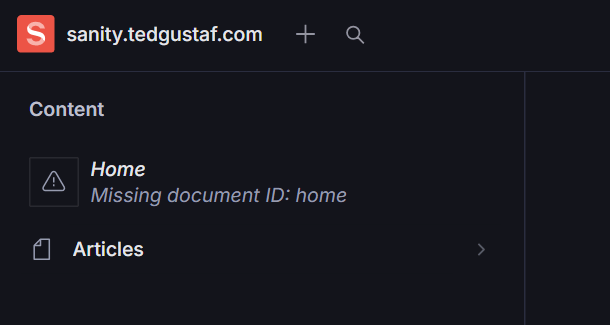
The warning displayed on the "Home" item is nothing to worry about, it's just saying that we haven't set up a home page yet - let's do that by clicking it. Add some content to it, and hit Publish.

And similarly, add some articles:

Bonus: Integrating Unsplash
Sanity supports uploading images to use in content out of the box, but they also have a neat plugin for selecting an image from Unsplash directly in the editing UI called Asset source for Unsplash. It's easy to set up!
Install the package:
npm i sanity-plugin-asset-source-unsplash
And then add it to sanity.config.ts:
import { defineConfig } from "sanity";
import { unsplashImageAsset } from "sanity-plugin-asset-source-unsplash";

export default defineConfig({
  ...
  plugins: [
    ...,
    unsplashImageAsset()
  ],
  ...
});
Now, when adding an image to content, you can search through Unsplash!

Deploying the studio
We're ready for deployment! Unless you have a preferred hosting solution, which is absolutely supported, Sanity includes hosting for your studio and a prepared script for deploying to it.
Simply run:
npm run deploy
You'll be asked to select a subdomain of sanity.studio for your first deploy:
✓ Checking project info
Your project has not been assigned a studio hostname.
To deploy your Sanity Studio to our hosted sanity.studio service,
you will need one. Please enter the part you want to use.
? Studio hostname (<value>.sanity.studio):
Choose a unique subdomain, let's go with foobar just as an example, hit Enter.
Once done, you should find your new studio hosted at https://foobar.sanity.studio (of course, replace "foobar" with the subdomain you selected), and you're all set!

Christoffer Sandell
Christoffer is CTO at ted&gustaf, responsible for delivery quality, developer processes, and technical choices. He works with development, maintenance, and provides technical support to the team.