Auto-generated web service proxy classes
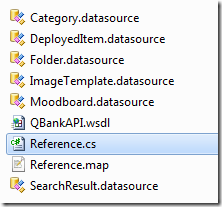
When a Web Reference is added in Visual Studio the generated proxy class automatically uses a default namespace which consists of the application’s default namespace together with the web reference name. The actual proxy class file is called Reference.cs and is stored in a sub folder of the Web References folder in your project:

Using a manually specified namespace
In our case we wanted a web service to use a different namespace for programmatic access to the web service.
I’m not sure if there’s a better way of doing this (I didn’t get any replies on Stack Overflow), but here’s one way of doing it.
Open the project properties and go to Build Events and edit the pre-build event:

Here’s the pre-build event command I added to my project:
"C:\Program Files (x86)\Microsoft SDKs\Windows\v7.0A\Bin\wsdl.exe" http://servername/path/to/wsdl/ /namespace:MyServiceNamespace /out:"$(ProjectDir)Web References\MyService\Reference.cs"
Note: You may have to modify the path to wsdl.exe.
Now, if we open the generated Reference.cs file we’ll see it uses the namespace we specified:
