Single-assembly gadgets for EPiServer
Why a single-assembly gadget?
When creating new gadgets for EPiServer Online Center you’ll find that you either 1) make your EPiServer site project an ASP.NET MVC project and add the gadget implementation to that or 2) create a separate ASP.NET MVC project and then just keep your views and content files in the EPiServer project while controllers and other logic go in the separate ASP.NET MVC project.
Either way this doesn’t do much for distribution and re-usability. Quite often a gadget is relevant for any EPiServer website, and therefore they should be easy to add and remove without polluting the website project.
So, single-assembly gadgets are for easily distributing and re-using gadgets across multiple EPiServer websites.
The overall idea
All files are embedded in the assembly
The idea behind a single-assembly gadget is that all files are embedded in the assembly. That means your user controls, script files, stylesheets, etc will all be distributed as part of your gadget assembly (DLL file).
Role of the support assembly
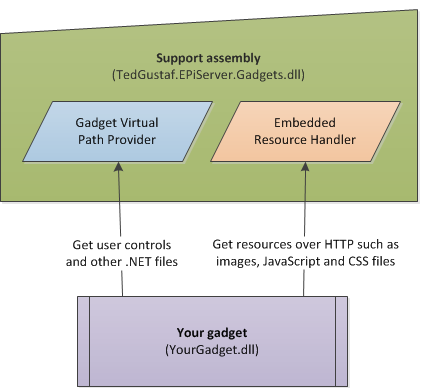
The support assembly (TedGustaf.EPiServer.Gadgets) makes single-assembly gadgets easy to create by handling some things for you:
- loading embedded ASP.NET files such as your gadget views (.ascx and .aspx files) from your gadget assembly
- serving HTTP requests for content files embedded in your gadget assembly, such as JavaScripts, stylesheets and images
Your gadget will link its content files with a prefix causing all those requests to be intercepted by an HTTP handler. Your gadget’s ASP.NET files will be served by a virtual path provider. So, your gadget consists of a single assembly which includes all files as embedded resources. The support assembly then helps to load those resources from your assembly.
How to create a new single-assembly gadget
To create a single-assembly gadget we need to:
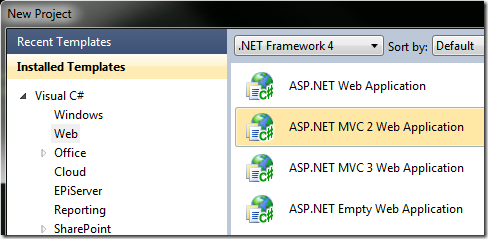
- Create a new ASP.NET MVC 2 project for the gadget (CMS 6 R2 doesn’t support MVC 3)
- Make sure all files are included as embedded resources
- Ensure TedGustaf.EPiServer.Gadgets.dll exists in the bin folder of your website
- Add your gadget’s assembly to the publicModules element in your site’s web.config file
- Add the HTTP handler for embedded resources
Note that a single gadget assembly can contain multiple gadgets.
Create your first single-assembly gadget
Create a new ASP.NET MVC 2 project
First, create a new ASP.NET MVC 2 project in Visual Studio. If the gadget will reference your website project you should add it to the same solution as the website, otherwise I’d recommend creating a stand-alone project.
Remove unnecessary files
I recommend removing unnecessary files from your MVC project to avoid it being cluttered, as per the gadget tutorial by EPiServer.
Add a gadget controller
The gadget controller routes requests for your gadget. The controller class is also where you set the name, description, and icon for your gadget.
Right-click the Controllers folder and select Add –> Controller:

Give your controller a name like SamleGadgetController (note the “Controller” prefix as per ASP.NET MVC conventions):

Next, add a Gadget attribute to the controller class to let EPiServer know that this controller represents a gadget:
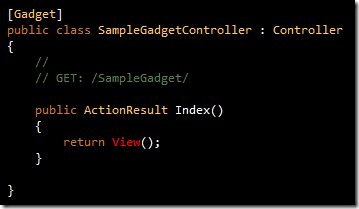
Note that Visual Studio is complaining about the View, that’s because we haven’t created one yet. Also, you need to add a reference to the EPiServer.Shell assembly for the Gadget attribute:
![]()
Create the gadget view
First, create a new folder underneath the Views folder. Give the folder the same name as the controller (except for the “Controller” suffix, that is):
![]()
Right-click the newly created folder and select Add –> View:

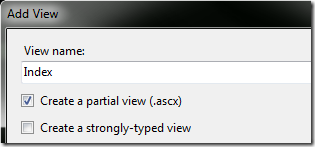
Since this is our default view we’ll call the view Index (as per ASP.NET MVC conventions). Don’t forget to check the Create a partial view (.ascx) checkbox:
Add some markup to your view:

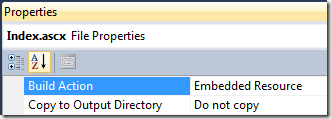
Make the view an embedded resource by right-clicking it in Solution Explorer, selecting Properties and finally setting the Build Action to Embedded Resource:
Add the gadget to your website
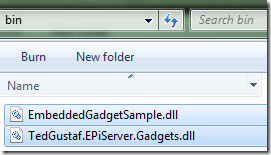
Make sure to build your gadget project. Next, copy its assembly (the DLL file) to the website’s bin folder (together with the TedGustaf.EPiServer.Gadgets assembly):
Next, make an addition inside the <publicModules> element within the <episerver.shell> element in web.config:
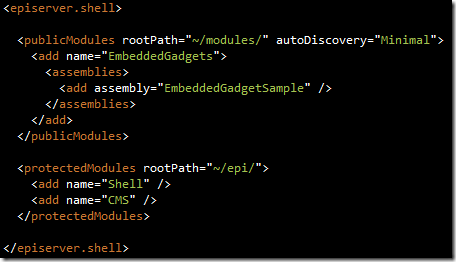
Note the name attribute of “EmbeddedGadgets”. This is crucial, the name has to be exactly “EmbeddedGadgets” for the assemblies to be linked to the support assembly (which in turn is what makes the single-assembly gadgets possible).
Add the gadget to your dashboard
Login to EPiServer and click Add Gadgets. You’ll notice that we have a new gadget available:
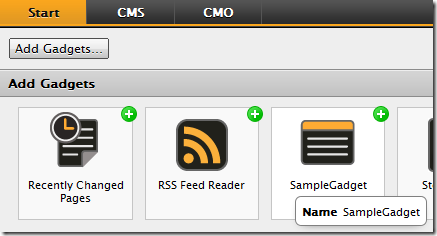
But more importantly, if we add the gadget by clicking the little green plus-sign button (for some reason you can’t drag and drop from here) we’ll see our embedded view being rendered:

Note that we haven’t actually added the view to the website project, it’s still embedded in our gadget assembly. All we had to do was to add the gadget assembly to the bin folder and register the assembly in web.config.
Add the HTTP handler
In order for us to embed other types of files in our gadget assembly, such as JavaScript, CSS, and image files, we need to add an HTTP handler to the <handlers> element in web.config:
I recommend adding a new <location> element for the “EmbeddedGadgets” path like so:
<location path="EmbeddedGadgets">
  <system.webServer>
    <handlers>
      <add verb="GET" name="EmbeddedGadgets" path="EmbeddedGadgets/*" type="TedGustaf.EPiServer.Gadgets.Handlers.EmbeddedResourceHandler" />
    </handlers>
  </system.webServer>
</location>
Customizing the widget appearance
Next, let’s set another title, description, and icon for our gadget, making it look a little nicer when users add it in Online Center.
Setting the gadget title and description
The title and description for the gadget are set by adding parameters to the controller’s Gadget attribute:

Adding a gadget icon
First, create a folder called Images under the Content folder and add your icon file to it:

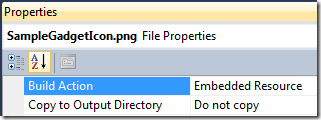
Don’t forget to set the image as an embedded resource:
Next, add an IconUrl parameter to the Gadget attribute (note the “EmbeddedGadgets” and assembly name prefix before the actual file path):
Check the result
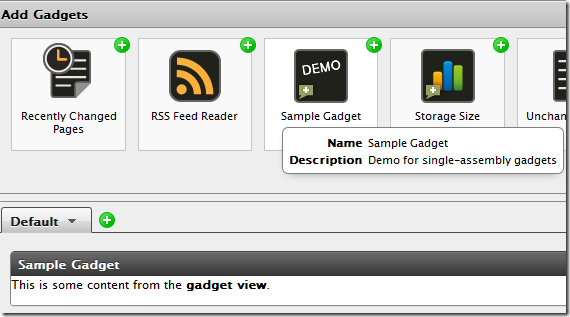
Now, if we re-compile the gadget assembly (and make sure the updated assembly is in the website’s bin folder) we can check the result in Online Center:
Linking embedded files
Your gadgets will most likely need images, CSS files, and JavaScript files. These should also be added as embedded resources in your project.
It’s important that all embedded files are linked with a URL prefix of “/EmbeddedGadgets/Your.Assembly.Name/” before the actual virtual path.
So, for the icon URL earlier: since our assembly is called EmbeddedGadgetSample, the icon file is in the /Content/Images folder, and the icon filename is SampleGadgetIcon.png, our full path to the embedded image is:
”/EmbeddedGadgets/EmbeddedGadgetSample/Content/Images/SampleGadgetIcon.png”
Download the support assembly and demo project
- Download the sample project (which also contains the support assembly)
- Download the support assembly only (single zipped DLL)
Moving on from here
If you decide to try this approach, please post any comments, questions, or general feedback in the comments below! Also, if you think it would be valuable to have the support assembly as a NuGet package, let me know and I’ll make sure to create one and publish it on the EPiServer developer feed.
